What Causes a Water Heater to Leak?
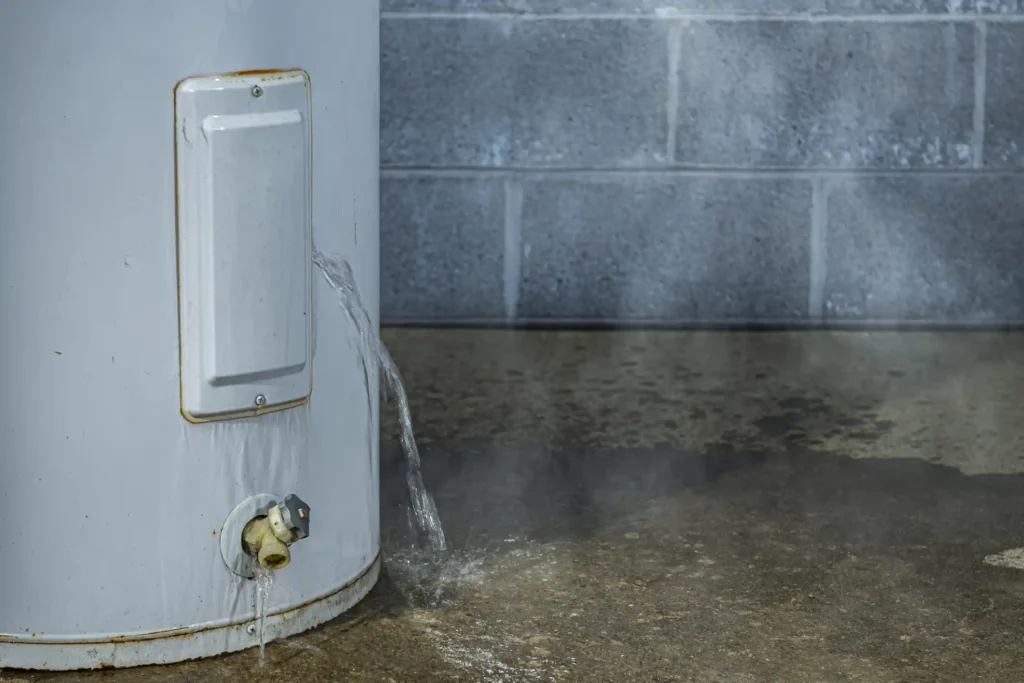
You walk into your basement and find a puddle around your water heater. Your heart sinks. Water heater leaks can cause serious damage to your home if ignored. The good news? Most leaks have clear causes and solutions. Understanding what causes a water heater to leak helps you act fast and avoid costly repairs. This guide covers everything you need to know about water heater leaks. We’ll walk through the most common causes, how to spot them, and what to do next. Whether you’re dealing with a small drip or a major leak, you’ll know exactly what steps to take. Understanding What Causes a Water Heater to Leak Water heater leaks happen for many reasons. Some are simple fixes you can handle yourself. Others need professional help. Let’s break down the main causes of water heater leaking so you can identify your problem quickly. 1. Drain Valve Issues The drain valve sits at the bottom of your tank. You use it to empty the tank for cleaning and maintenance. Over time, this valve can become loose from regular use. A loose drain valve creates small gaps where water escapes. Sometimes you’ll see a slow drip. Other times, water pools at the base of your heater. The Fix: Try tightening the valve with a pipe wrench. Turn it clockwise gently. Don’t force it. If the valve is corroded or loose at the base, you’ll need a replacement. This is a simple fix most homeowners can do. 2. Temperature and Pressure Relief Valve Problems Your T&P relief valve is a critical safety feature. It releases excess pressure and prevents your tank from exploding. When this valve malfunctions, you’ll notice water leaking from the top of your heater or from the side. The valve should only open when pressure or temperature gets too high. If it leaks constantly, something is wrong. Either the valve is faulty or your water temperature is set too high. The Fix: Check your thermostat first. It should be set to 120 degrees Fahrenheit. Higher temperatures cause unnecessary pressure buildup. If the temperature is correct but the valve still leaks, replace it immediately. This isn’t optional. A broken pressure relief valve is a safety hazard. 3. Inlet and Outlet Connection Leaks Cold water enters your tank through the inlet connection. Hot water exits through the outlet connection. These connections sit at the top of your water heater. Both connections can loosen over time. The heating and cooling cycle causes metal to expand and contract. This constant movement weakens the connections. Water leaking from the top of your heater usually points to loose inlet or outlet pipes. You might see water dripping down the sides of the tank. The Fix: Use a pipe wrench to tighten both connections. Turn them clockwise. Check for corrosion while you’re at it. Corroded fittings need replacement even if they feel tight. 4. Old Age and Rust Buildup Tank water heaters last about 10 to 12 years on average. As your heater ages, the interior starts to corrode. Rust eats through the metal and creates cracks. You can’t see this internal corrosion until it’s too late. Water starts seeping through tiny cracks in the tank walls. Once the tank itself cracks, there’s no repair option. The Fix: If your water heater is over 10 years old and leaking from the tank body, replacement is your only choice. You can’t patch a corroded tank permanently. The cracks will keep growing. 5. Sediment and Mineral Buildup Hard water contains minerals like calcium and magnesium. These minerals settle at the bottom of your tank as sediment. Over years, this sediment layer hardens and creates pressure points. The sediment causes several problems. It reduces heating efficiency. It makes strange popping noises. Most importantly, it can crack your tank from the inside. The Fix: Flush your water heater twice a year. This removes sediment before it hardens. Empty the tank through the drain valve. Run fresh water through until it comes out clear. Regular flushing extends your heater’s life by several years. 6. Failed Anode Rod The anode rod is your tank’s first line of defense against corrosion. This metal rod attracts corrosive elements in your water. It sacrifices itself to protect your tank. Over time, the anode rod corrodes completely. Once it’s gone, rust attacks your tank directly. This leads to internal corrosion and eventual leaks. The Fix: Inspect your anode rod every three to five years. If more than six inches of the core wire is exposed, replace it. A new anode rod costs $20 to $50 and adds years to your tank’s life. 7. High Water Pressure Your water heater creates pressure as it heats water. Normal pressure isn’t a problem. But if your home’s water pressure is too high, it stresses every connection and seal. Excess pressure finds weak points in your system. It can force water past gaskets and through tiny cracks. You might not see an obvious leak source. The Fix: Test your home’s water pressure with a gauge. Normal pressure is 50 to 60 PSI. Anything over 80 PSI is too high. Install a pressure reducing valve on your main water line. This protects your entire plumbing system, not just your water heater. 8. Cracked Storage Tank Some water heaters have a glass-lined interior tank. This glass lining prevents corrosion. But minerals in hard water can damage the glass over time. The minerals create weak spots. Eventually, these spots crack. Water seeps through the cracks into the space between the inner and outer shells. The Fix: A cracked glass tank needs complete replacement. There’s no way to repair the interior lining. If you live in a hard water area, consider installing a water softener to protect your new heater. 9. Loose Heating Element (Electric Heaters Only) Electric water heaters have heating elements that screw into the tank. These elements have gaskets that seal against water. Over time, these gaskets can fail or the elements can loosen. When this happens, water leaks around
What Causes a Water Heater to Leak? Read More »


