Thinking about ditching your old water tank? Good call. But before you jump in, here’s the honest truth — figuring out how to install a tankless water heater isn’t exactly a weekend DIY project. Getting the gas line sized right, sorting out the venting, and passing local code inspection takes real know-how.
That’s exactly why most homeowners in Temecula and Murrieta call Hutchinson Heating and Air. Getting it done right the first time is a lot cheaper than fixing a botched installation later.
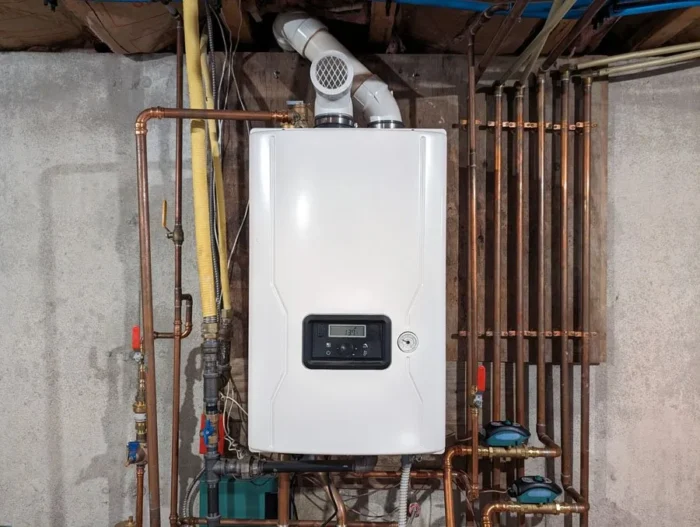
What Is a Tankless Water Heater and How Does It Work?
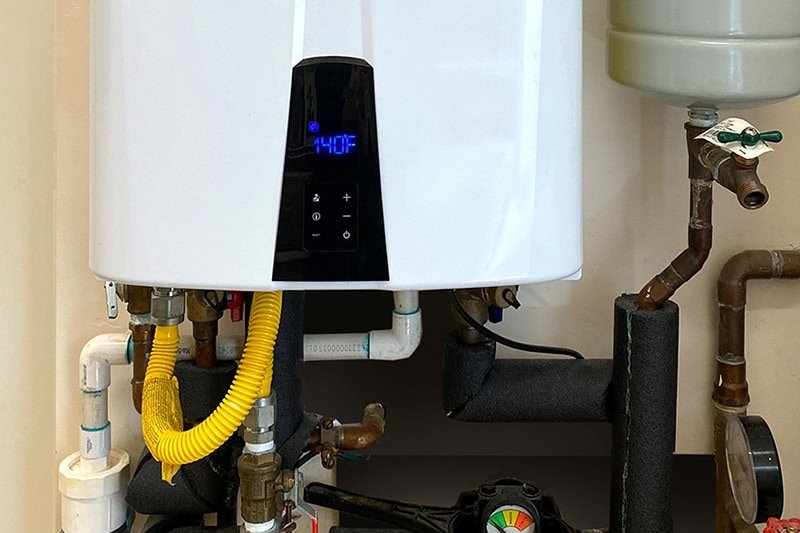
A tankless water heater is a compact unit that heats water as you want it. The heater does not have a water storage tank. When you turn on a water faucet a sensor finds the water moving and turns on the heating unit. This can be a gas, propane, or electric water heater.
The cold water goes through a really good heat exchanger if it is fuel oil or over elements if it is electric and gets heated to a good temperature really fast. Tankless water heaters have control devices that change the water temperature and show that they are working safely. Tankless water heaters are really good, at keeping the water at the temperature.
Advantages of a Tankless Heater

A tankless water heater has many advantages over traditional warm water tanks.
Never Run Out of Hot Water
You will never run out of warm water so long as you do now no longer exceed the flow rate. A tankless water heater constantly heats the water strolling thru the faucet.
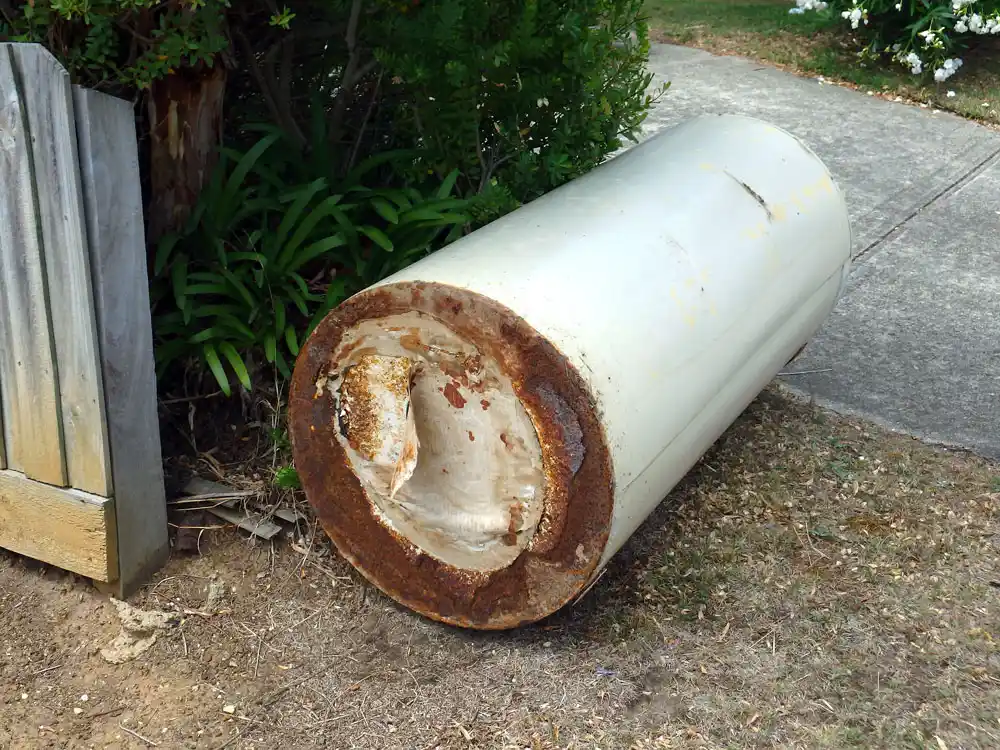
Longer Lifespan Than a Traditional Tank Heater
Tankless water warmers can last as long as two times so long as warm water tanks. They normally use corrosion-resistant copper or chrome steel heat exchangers have many advantages over traditional. and don`t have a water garage tank that may corrode.
According to Energy.gov, maximum gadgets have a existence expectancy of over two decades despite the fact that they do require periodic upkeep to have a protracted existence.
In fact, many A. O. Smith gas tankless water heater include X3® Scale Prevention Technology to supply non-stop warm water, even as protective in opposition to scale build-up, that means certainly 0 lifetime descaling upkeep and up to $2,800 in upkeep value financial savings over the existence of the product.
Reliability and Ease of Repair
These devices are dependable and clean to hold and repair. You can update maximum additives easily, and controllers characteristic self-diagnostic capabilities.
Efficiency
Because they don`t shop warm water, tankless water warmers are greater green than warm water tanks. They most effective use power to warmth water whilst water is in use.
Depending for your water usage, Energy.gov reviews that:
Small on-call for warmers are among 24% and 34% greater power green than garage tank warmers. In houses that use a variety of warm water, you could anticipate power financial savings of among 8% and 14%.
Can Be Installed Outdoors
You can set up sure fashions outdoors. An out of doors set up allows if you have restrained area internal and permits you to vicinity the water heater quite simply near your warm water faucet. It additionally simplifies venting preparations with a gas tankless water heater installation.
Read More: How to Hide Tankless Water Heater?
Not Sure Which Water Heater Is Right for You?
Choosing a water heater can be really tough. It is pretty simple when you think about it. You need to consider your budget, the size of your household and how hot water you use. Water heaters that are heat water when you need it so you do not have to pay to keep a tank full of hot water all the time.
These water heaters are great if you want to save energy in the run and you are okay with spending more money upfront. Traditional water heaters that have a tank cost less to put in. They are always running, which means your energy bill will be higher over time.
If you live in a household or you use hot water at different times of the day then a tankless water heater is a good choice. Tankless water heaters are really good for people who want to save energy and don’t use a lot of water at the same time. Water heaters that are tankless are an option, for people who want to save money on their energy bill in the long run.
How to Install a Tankless Water Heater | Step-by-Step
This isn’t the kind of job where you figure it out as you go. Here’s exactly how a proper installation gets done, step by step.
Step 1: Shut Off Everything First
Before you touch anything, cut the gas supply and flip the breaker. Then shut off the main water supply. Don’t skip this — it’s not just about safety, a live gas line during installation is a code violation waiting to happen. Open a hot water faucet somewhere in the house to release any pressure still sitting in the lines.
Step 2: Drain and Remove the Old Unit
If you’re replacing a tank heater, connect a garden hose to the drain valve and empty it completely. This takes longer than people expect — a 40-gallon tank doesn’t drain in five minutes. Once it’s empty, disconnect the water lines, gas line or electrical connections, and remove the old venting. Cut the straps and pull the tank out. It’s heavy, get someone to help.
Step 3: Mount the New Tankless Unit
Tankless units mount directly to the wall — that’s one of the best parts. Use a level to make sure it’s perfectly straight, then drill into wall studs and secure the mounting bracket. The unit needs to be close enough to your gas line and water lines without stretching connections. Most manufacturers specify clearance requirements in the manual — follow them.
Step 4: Connect the Water Lines
You’ll have two connections — cold water in and hot water out. Install isolation valves on both sides before connecting anything. This lets you service the unit later without shutting down your whole water supply. Use a pressure relief valve on the hot side and make sure everything is tight. Hand-tight isn’t enough here — use a pipe wrench and wrap all threaded connections with Teflon tape.
Step 5: Connect the Gas Line or Electrical
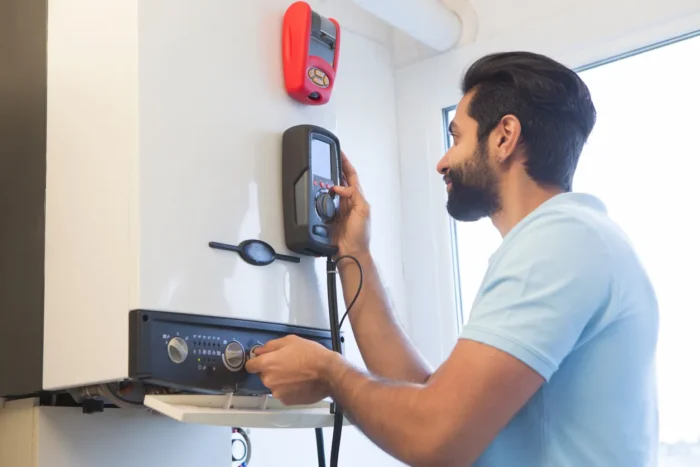
This is where most DIYers should stop and call a professional.
For gas units — the existing gas line in most older homes simply can’t handle the BTU demand of a tankless heater. You’ll likely need the line upsized before connecting anything. Use a gas-rated flexible connector, apply pipe thread sealant on all joints, and once connected, test every single joint with soapy water before you turn the gas back on. Any bubbles mean a leak. Stop and fix it.
For electric units — you need a dedicated 240V circuit. Check your panel first. Most tankless electric heaters need a 40–60 amp breaker and the right gauge wire to match. If your panel is already maxed out, that’s a separate job before this one can happen.
Step 6: Install the Venting
Gas units need proper venting — this is non-negotiable. High-efficiency condensing models can use PVC or CPVC pipe, which is cheaper and easier to run. Non-condensing models need Category III stainless steel venting — don’t substitute this with regular pipe. The vent pipe needs to slope slightly downward away from the unit so condensation drains out properly. Run it to the exterior of the home and make sure the termination point is away from windows and doors.
Electric units? No venting needed. One less thing to worry about.
Step 7: Turn Everything On and Test
Open the cold water isolation valve first and let the unit fill up. Check every water connection for drips before moving forward. Then slowly turn the gas back on and relight the pilot if needed, or restore power for electric units. Turn on a hot water faucet and let it run for a couple of minutes. The water should heat up within about 15 seconds of turning the tap.
Check the temperature setting on the unit — most manufacturers set it to 120°F out of the box, which is the recommended safe temperature for most households. Adjust if needed.
Walk back through every connection one more time — water lines, gas joints, venting — and confirm there are no leaks, no smells, and no error codes on the display.
One Last Thing
Pull the permit before you start any of this. It feels like an annoying extra step but if you ever sell your home, an unpermitted water heater installation will come up during inspection and cost you a lot more to sort out than the permit ever would have.
It is in no way a terrific concept to reduce corners on such an essential equipment for your house. If you continue to have lingering questions please contact Hutchinson Heating and Air our experts are there to help and guide you.
Can a homeowner install a tankless water heater by themselves?
Well technically the answer is yes.. It’s not that simple. If you are swapping out a tankless water heater for another electric one then it might be okay to do it yourself. However if you are switching to a gas model things get complicated. You will need to upgrade your gas lines to handle the BTUs and install special stainless-steel venting.
One big mistake to avoid is taking shortcuts with the venting. You could end up with carbon monoxide buildup in your home. Most experts suggest that do-it-yourselfers handle the mounting part but leave the gas work and final plumbing connections to a technician. That way your warranty will still be valid.
What Supplies Do I Need to Install a Tankless Water Heater?
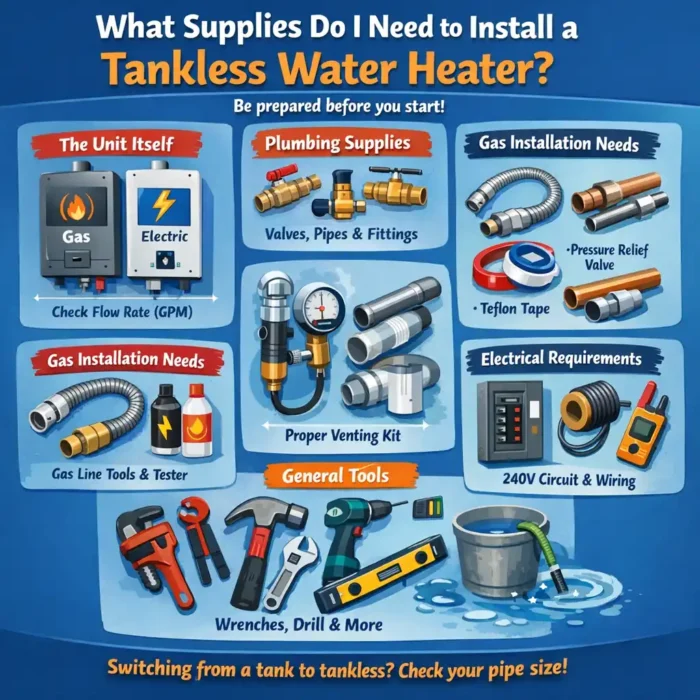
Honestly, the worst part of any installation isn’t the work itself — it’s realizing you’re missing something halfway through. So do yourself a favor and have everything ready before you start.
The Unit Itself
- The tankless water heater that matches your fuel type — gas, propane, or electric
- Make sure the GPM (gallons per minute) flow rate actually covers your household’s demand before you buy
Plumbing Supplies
- Isolation valve kit — both hot and cold sides, don’t skip these
- Pressure relief valve for the hot water outlet
- PEX-B or copper pipe — PEX-B is easier to work with and handles freeze-thaw better, copper costs more but lasts longer in high-heat applications. Pick based on what your existing plumbing uses
- Pipe fittings and connectors sized to match your current plumbing
- Teflon tape and pipe thread sealant — use both on threaded connections
Gas-Specific Tools (if going gas)
- Gas-rated flexible connector — sized correctly for your BTU load
- Manometer — this is what you use to test gas pressure before and after installation. Most DIYers skip this and shouldn’t. Low pressure means the unit won’t fire properly, high pressure can damage the heat exchanger
- Pipe thread sealant rated for gas lines — regular Teflon tape alone isn’t enough on gas fittings
- Soapy water solution or gas leak detector spray for checking every joint after connection
Venting Supplies (gas units)
- For condensing models — PVC or CPVC venting pipe plus a condensate trap to catch the drainage that high-efficiency units produce. Without it, acidic condensate backs up into the unit and causes damage over time
- For non-condensing models — Category III stainless steel vent pipe, no substitutions
- Vent termination cap for the exterior wall
Electrical Supplies (electric units)
- Dedicated 240V circuit with correct breaker size — check your unit’s spec sheet for exact amperage
- Correct gauge wire to match — undersizing the wire is a fire hazard
- Voltage tester — always confirm the circuit is dead before touching anything
General Tools
- Pipe wrench and adjustable wrench
- Power drill with masonry or wood bits depending on your wall type
- Level — the unit needs to hang perfectly straight
- Bucket and garden hose for draining the old tank
One thing worth knowing — if you’re switching from a tank heater to tankless, your existing pipe diameter may need upsizing too. Tank heaters typically run on ¾ inch supply lines. Some high-demand tankless units want 1 inch. Check the spec sheet before you buy your fittings or you’ll be making an extra hardware store run mid-job.
What Does It Cost to Install a Tankless Water Heater?
Before anything else, let’s talk numbers — because nobody wants a surprise bill when the job is half done.
Unit Cost
| Type | Low End | High End |
| Electric Tankless (point-of-use) | $150 | $600 |
| Electric Tankless (whole-house) | $500 | $1,000 |
| Gas Tankless (standard) | $500 | $1,200 |
| Gas Tankless (high-efficiency condensing) | $1,000 | $2,000 |
Installation Labor Cost
| Work Required | Estimated Cost |
| Basic installation labor | $300 – $700 |
| Gas line upgrade/extension | $200 – $800 |
| Electrical panel upgrade | $500 – $1,500 |
| New venting installation | $200 – $500 |
| Permit fees | $50 – $200 |
Total Cost Breakdown
| Scenario | Estimated Total |
| Electric unit, simple swap | $500 – $1,500 |
| Gas unit, existing lines work | $800 – $2,000 |
| Gas unit, needs line upgrade | $1,500 – $3,500 |
| Full install with panel/venting upgrades | $2,500 – $5,000 |
What Actually Drives the Cost Up
Most people budget for the unit and labor and forget everything else. Here’s what catches homeowners off guard:
Gas line upgrades are the biggest hidden cost. If your existing line can’t handle the BTU load — and in older homes it usually can’t — you’re looking at $200 to $800 just for that part of the job before anything else happens.
Electrical panel upgrades hit hard if you’re going electric. Whole-house electric tankless units are power-hungry. If your panel is already near capacity, an upgrade runs $500 to $1,500 on top of everything else.
Venting adds up faster than people expect, especially if your unit is far from an exterior wall. Every extra foot of stainless steel Category III venting for a non-condensing unit adds to the bill. Switching to a condensing model that uses PVC venting can actually save you money here.
Electric vs. Gas — Which Costs Less Overall?
Electric units are cheaper to install upfront — simpler hookup, no venting, no gas line work. Gas units cost more to install but typically run cheaper month to month on energy bills, especially in households with high hot water demand.
Key Differences Between Electric and Gas Water Heater Installation
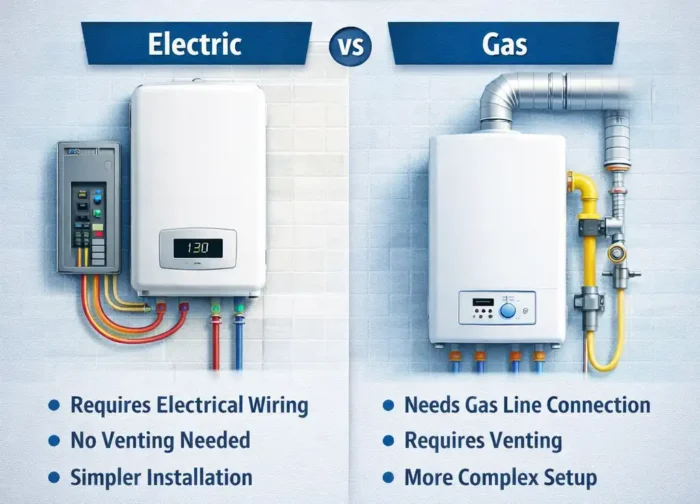
Gas installs take longer, plain and simple. The surprise cost that catches most people off guard — older gas lines usually can’t handle a tankless unit and need upgrading before anything else happens. Electric skips all that drama.
| Electric | Gas | |
|---|---|---|
| Install Time | Few hours, pretty straightforward | Takes longer, more steps involved |
| Venting | None needed | Yes, you’re cutting through walls sometimes |
| Hidden Costs | Rarely any surprises | Old gas lines often need upgrading |
| Inspection Steps | Simpler, fewer people involved | More checkpoints, stricter sign-off |
| Main Requirement | Dedicated 240V circuit | Proper gas line sizing + venting |
| Best For | Smaller homes, cleaner simple install | Big households with existing gas setup |
If your home already runs on gas and you burn through hot water daily, gas wins long term on energy bills. But if you just want something done quickly without unexpected costs piling up — electric is the smarter, simpler choice. Don’t overthink it.
Before You Begin: Things to Consider
Most installation problems don’t happen during the job — they happen because nobody checked these things beforehand. Spend 30 minutes on this list before you buy anything or touch a single pipe.
1. Size the Unit Correctly (GPM Flow Rate)
This is the mistake that causes the most regret. People buy a unit based on price and find out later it can’t keep up with their household demand.
Here’s how to figure out what you actually need — add up the flow rate of every fixture you might run at the same time. A shower typically runs at 1.5 to 2.5 GPM. A kitchen faucet runs around 1.5 GPM. A dishwasher pulls about 1 GPM. If two people shower while the dishwasher runs, you’re looking at 5 to 6 GPM minimum.
Also factor in your groundwater temperature. If you’re in a colder climate, the incoming water is colder and the unit has to work harder to hit your target temperature — which means you need a higher GPM rated unit than someone in a warmer area with the same household size.
2. Check Your Gas Line Capacity
This one catches a lot of homeowners off guard. Tankless gas water heaters are BTU-hungry — most units demand between 150,000 and 200,000 BTUs. Your existing gas line was probably sized for a traditional tank heater running at 30,000 to 40,000 BTUs.
That’s a massive difference. Before installation day, have a plumber or gas technician measure the actual gas pressure at the point of connection using a manometer. If the line can’t deliver enough pressure under load, the unit will short cycle, throw error codes, or simply not fire properly. Upgrading the gas line before installation saves you a very frustrating callback.
3. Check Your Electrical Panel
Even gas tankless units need electricity to run the ignition, controls, and display. A dedicated circuit is usually required.
For electric tankless units specifically — this is where surprises happen. Whole-house electric tankless heaters can pull 150 to 200 amps during peak demand. If your panel is a 100-amp service, that’s a problem before you even get started. Point-of-use electric units are smaller and more manageable, but whole-house units may require a panel upgrade before installation is even possible.
Check your panel first. If it’s already close to capacity with your current loads, talk to an electrician before committing to an electric tankless unit.
4. Check Your Water Pressure
Tankless water heaters have a minimum activation pressure — usually around 25 PSI — needed to trigger the flow sensor and fire the unit. But high pressure is just as much of a problem.
Most manufacturers specify a maximum inlet pressure of 80 PSI. If your home’s water pressure runs above that, the unit can develop leaks, stress the heat exchanger, and void your warranty over time. Pick up an inexpensive water pressure gauge at any hardware store and test your pressure at an outdoor spigot before installation. If it’s above 80 PSI, install a pressure reducing valve on the main line first.
5. Know What Venting Your Home Can Support
Before buying a gas unit, look at where you’re going to vent it. Condensing units vent through PVC which is easy to run almost anywhere. Non-condensing units need stainless steel venting which is harder to route through walls and ceilings.
If your installation spot is far from an exterior wall, a condensing model will save you a lot of headache. If you’re replacing an existing tank heater, check whether the current vent can be reused or needs to be replaced entirely — old B-vent flues are not compatible with tankless units.
6. Pull the Permit
Seriously, don’t skip this. In most states and counties, replacing a water heater requires a permit and inspection — gas work especially. It’s not just a bureaucratic formality either. The inspection catches things that even experienced installers occasionally miss.
More practically — if you sell your home without a permit on record for the water heater installation, a good home inspector will find it. At that point you’re either pulling an after-the-fact permit, doing remediation work, or negotiating a price reduction with your buyer. The permit costs far less than any of those scenarios.
Common Mistakes to Avoid When Installing a Tankless Water Heater
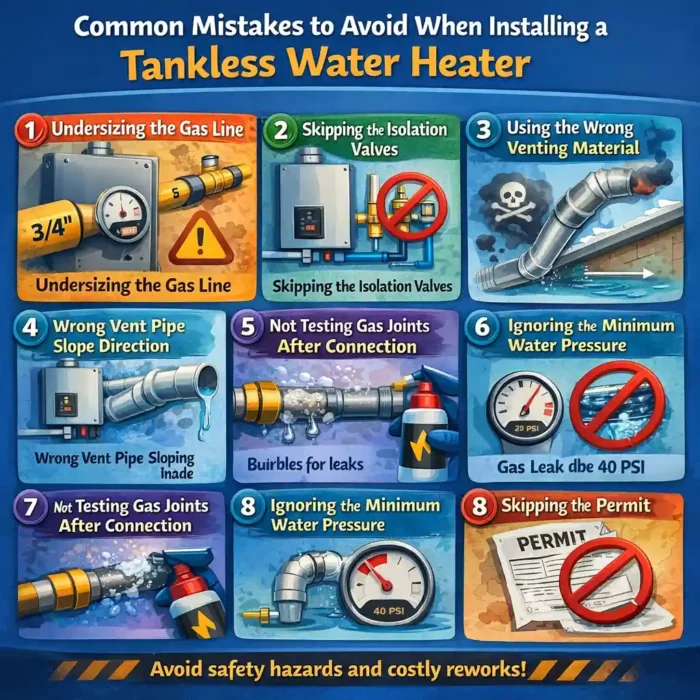
Most installation headaches are completely avoidable. These are the mistakes that show up again and again — some are minor inconveniences, a couple of them are genuinely dangerous.
1. Undersizing the Gas Line
Hands down the most common and most expensive mistake. People buy the unit, install everything perfectly, turn it on — and it either doesn’t fire or keeps throwing error codes. Nine times out of ten it’s because the gas line can’t deliver enough pressure to meet the BTU demand.
A traditional tank heater runs on 30,000 to 40,000 BTUs. A tankless unit needs 150,000 to 200,000 BTUs. Your existing ¾ inch gas line was never designed for that load. Check gas pressure with a manometer before installation, not after. Fixing an undersized gas line after everything is already connected and drywalled is a miserable job.
2. Skipping the Isolation Valves
This one doesn’t cause an immediate problem — which is exactly why people skip it. Isolation valves on both the hot and cold water lines let you shut off water to just the heater without cutting supply to the whole house.
Skip them during installation and the first time you need to flush the unit for maintenance or swap out a part, you’re shutting water off to the entire home. It’s a cheap fix upfront and an annoying problem later. Just install them.
3. Using the Wrong Venting Material
This one can actually get people hurt. Non-condensing gas tankless units produce exhaust gases that can reach 300°F or higher. That heat will warp and melt PVC pipe — which some people use anyway because it’s cheaper and easier to work with.
Non-condensing units need Category III stainless steel venting, full stop. Condensing units run cooler and can use PVC or CPVC. Check your specific model before buying any venting materials. Using the wrong type doesn’t just fail inspection — it’s a carbon monoxide risk inside your home.
4. Wrong Vent Pipe Slope Direction
Even people who use the correct venting material get this wrong. The vent pipe needs to slope slightly downward away from the unit toward the exterior — not upward, not flat, downward.
Here’s why it matters. Condensing units produce liquid condensate that needs to drain out. If the pipe slopes the wrong way, that condensate pools inside the unit, causes corrosion, and eventually damages the heat exchanger. A damaged heat exchanger on a tankless unit is not a cheap repair. Get the slope right from the start — manufacturers typically specify ¼ inch drop per foot of horizontal run.
5. Forgetting the Condensate Trap on Condensing Models
Speaking of condensate — high-efficiency condensing tankless heaters produce a surprisingly large amount of acidic drainage during operation. That drainage needs somewhere to go.
Without a condensate trap, it either backs up into the unit or drains somewhere it shouldn’t. The trap neutralizes the acidity before it hits your drain line and prevents the backflow that damages internal components. It’s a small inexpensive part that a lot of first-time installers simply don’t know about until something goes wrong.
6. Not Testing Gas Joints After Connection
This should be obvious but it still gets skipped. Every single gas joint needs to be tested with soapy water or a gas leak detector spray after the line is reconnected and before you fire the unit up.
Don’t rely on smell alone — small leaks don’t always produce an obvious odor right away. Brush soapy water on every joint and watch for bubbles. No bubbles, you’re good. Any bubbles at all, shut the gas off immediately and fix the joint before going any further.
7. Ignoring the Minimum Water Pressure Requirement
Tankless units need a minimum flow rate to activate — typically around 0.5 GPM — and a minimum inlet pressure to operate correctly. If your home has low water pressure, the unit’s flow sensor may not trigger at all, meaning you turn on the tap and get cold water with no explanation.
Test your water pressure before installation. If it’s below 40 PSI consistently, look into a pressure booster pump or reconsider the unit placement closer to the main supply line.
8. Skipping the Permit
Already mentioned this in the previous section but it’s worth repeating here because it specifically comes up as an installation mistake. Plenty of people install without a permit thinking nobody will notice.
They notice during a home sale. They notice during a homeowner’s insurance claim. They notice when something goes wrong and the warranty requires proof of permitted installation. The permit exists to protect you — skipping it only creates problems down the road.
Professional vs. DIY Installation
Gas? Please just hire someone. I know it feels like an unnecessary expense but gas line mistakes are no joke — leaks, failed inspections, voided warranties. Not worth it.
Electric is a different story. If you’ve swapped out a breaker before and you’re comfortable around your panel, you can probably handle it. Just don’t rush it.
One thing nobody tells you — always pull the permit. Skipping it feels smart until you’re trying to sell your house and the inspector asks questions you can’t answer.
Conclusion
When you are trying to install a Tankless Water Heater you have to be very careful. Installing a Tankless Water Heater is not just about hanging the unit on the wall. You need to make sure the Tankless Water Heater is the size, for your needs. You also need to connect the fuel lines and set up the venting system properly. If you do all these things correctly and get a professional to help you with the setup of the Tankless Water Heater it will work well for a time.
Whether you want a complete tankless hot water heater installation or a expert tankless gas water heater set up/installation, getting the activity performed proper protects your private home and maximizes efficiency. For a secure and dependable tankless water heater installion in Temecula, house owners in Temecula and Murrieta believe Hutchinson Heating and Air to supply professional carrier and lasting comfort.
Frequently Asked Questions
How to install a tankless water heater correctly?
Start by shutting off all utilities — gas, water, and electricity. Remove the old unit, mount the new tankless heater on the wall, connect the water lines with isolation valves on both sides, hook up the gas line or electrical connection, install proper venting for gas units, then test everything thoroughly before calling it done. If you’re dealing with gas lines or electrical work, hire a licensed professional — it’s not worth the risk of cutting corners on either of those.
Do I need a permit to install a tankless water heater?
In most cities and counties, yes — a permit is required, especially for gas work. Temecula and Murrieta both require permits for water heater replacements. Skipping the permit feels like a time saver until you try to sell your home or make an insurance claim. Pull the permit, get the inspection done, and have the paperwork on file. It protects you more than it inconveniences you.
How long does a tankless water heater installation take?
A straightforward swap — same fuel type, existing lines are compatible — typically takes one experienced technician about 3 to 4 hours. If you’re switching from a tank heater to tankless for the first time, expect 6 to 10 hours depending on what needs to be upgraded. Gas line work, new venting runs, or electrical panel upgrades add time on top of that. Don’t schedule this job for the morning and expect hot water by lunch if it’s your first tankless installation.
What size tankless water heater do I need for a family of 4?
For a family of four, you’re generally looking at a unit that can handle 7 to 9 GPM. Here’s the simple way to figure it out — think about your peak usage moment. In most four-person households that’s two showers running simultaneously, which already puts you at 4 to 5 GPM. Add a dishwasher or washing machine running at the same time and you’re at 6 to 7 GPM easily. Buy for your peak demand, not your average usage. Undersizing this is one of the most common and most frustrating mistakes people make.
Is a tankless water heater harder to install than a regular tank?
Yes, significantly. A traditional tank heater is basically a plug-and-play replacement — same connections, same venting, same footprint. Tankless installation involves wall mounting, potentially upgrading gas lines, running new venting, and in some cases electrical panel work. The payoff is worth it long term but don’t go into it expecting a simple afternoon project.
Can I install a tankless water heater myself?
For electric units — if you’re comfortable around your electrical panel and you’ve done similar work before, it’s possible. For gas units, the honest answer is that most homeowners shouldn’t attempt the gas line and venting work themselves. Not because it’s impossibly complicated, but because the consequences of getting it wrong range from failed inspection to carbon monoxide buildup in your home. Handle the mounting yourself if you want, but leave the gas connections and venting to a licensed technician. Your warranty likely requires professional installation anyway.