
March 13, 2026/
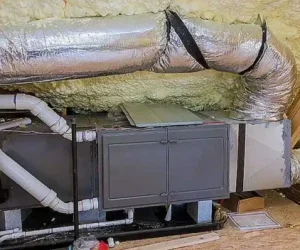
When house owners ask, what’ is forced air heating? it`s generally due to the fact they`ve heard this term however aren`t...


When house owners ask, what’ is forced air heating? it`s generally due to the fact they`ve heard this term however aren`t...
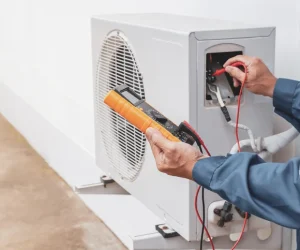
A heat pump could make lifestyles comfortable when temperatures drop… however how do you already know whilst you may not...
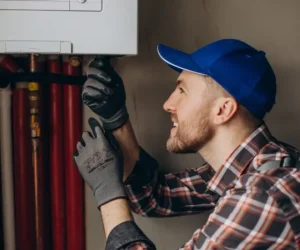
You just got a new heating and cooling system put in. The workers were there, for hours moving stuff around...
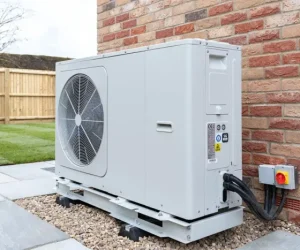
If you`re seeking out a reliable, energy-green/ efficient way to maintain comfortablance of your house year-round, heat pumps are a...
Home heating and cooling structures are expensive, so it`s comprehensible for house owners to assume this funding to closing them...
There are a lot of homeowners that doesn’t know what heating and cooling system they have in their home. People are...
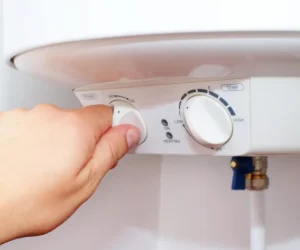
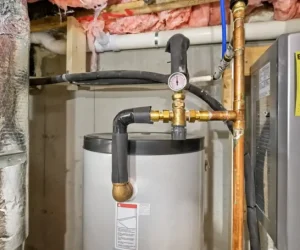
Hot water is one of those things in our homes that we expect to always work. Maybe you’ve just moved in,...
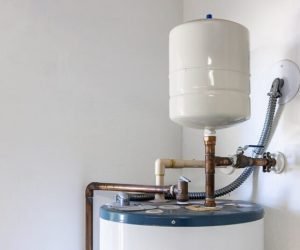
Most homeowners spend between $150 and $350 for a complete water heater expansion tank installation. When you break down the...
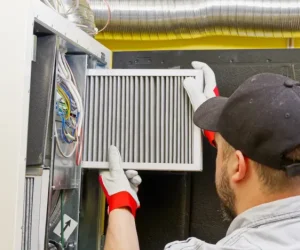
If you’ve got got ever checked out a furnace clear out out and questioned what does MERV mean on furnace...
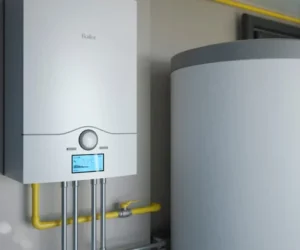
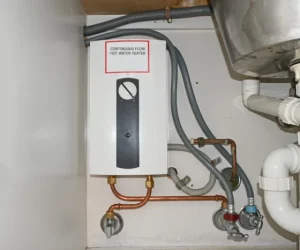
If you’re attempting to find How to Install Tankless Water Heater, you’re possibly making plans to improve to a extra...
Do you ever notice a lasting gas smell when turning on your gas heater? Gas heater smell can be both...

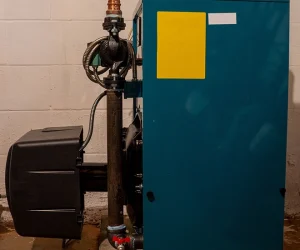
When deciding on a heating system, house owners need to make sure they`re getting some thing dependable and lengthy-lasting. Oil...
Many house owners observe some thing confusing. Their domestic feels cool, however it nonetheless feels damp or sticky. This regularly...
Are you really want to know how many watts does a furnace use? Electric and gas furnaces are usually one...
One of the most common questions we get from customers about electric water heaters is whether, is an expansion tank...
If you’ve got ever asked, How Does Heat Pump Work, you aren’t alone. Many owners get to know that heat...

Many owners ask, do electric furnaces have pilot lights while their heating machine stops working. The confusion is very common...
Your water heater works quietly withinside the history each day. You don`t reflect onconsideration on it—till some thing feels off....

If your water heater smells like burning, it`s now no longer some thing you ought to ignore. A burning smell...

Water warmers are one of the maximum essential home equipment on your home — however they`re additionally one of the...
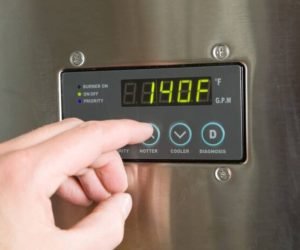
Knowing what temperature to set water heater is vital for family comfort, electricity performance, and protection. Many house owners expect...
One of the primary questions owners ask while making plans a heating improve is how long does it take to...
When house owners in Temecula and Murrieta recall upgrading their heating and cooling structures, one of the maximum not unusualplace...

When you switch on the faucet awaiting heat water and are met with an icy surprise, it`s greater than simply...
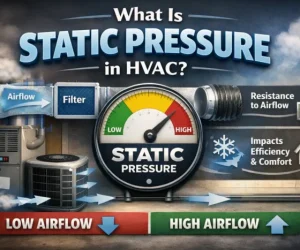
Many house owners ask what is static pressure in HVAC after they be aware airflow problems, choppy temperatures, or sudden...
When owners be aware their AC is cooling but no removing humidity, it could be perplexing and uncomfortable. The temperature...
Homeowners thinking about a gasoline-primarily based totally heating machine regularly ask how much does a propane furnace cost and whether...
When house owners in Temecula and Murrieta examine present day heating alternatives, the query of modulating vs 2 stage furnace...
Understanding the signs and symptoms of dirty air filter in home is important for preserving healthful indoor air first-class and...
Many owners ask what is a modulating furnace whilst getting to know high-performance heating structures for constant consolation and decrease...
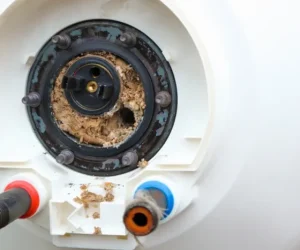
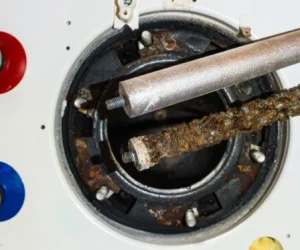
Many owners in the end ask what does water heater sediment look like once they note cloudy warm water, peculiar...
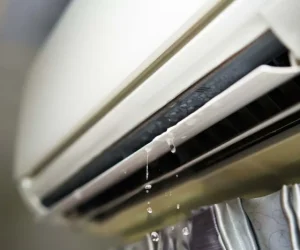
A mini split leaking water is one of the maximum not unusualplace problems owners face with ductless aircon systems. While...

If you`re retaining your home`s plumbing device or noticing rust, cloudy water, or uncommon odors, you’ll be asking does gas...
If you`ve ever became on more than one taps without delay and all of sudden misplaced warm water pressure, you’ll...
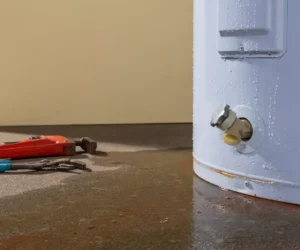
Discovering while a water heater is leaking from bottom is one of the maximum alarming troubles a property owner can...
When sellers of HVAC systems make a sale to a homeowner or business owner, they expect the system to operate for...

Understanding how much energy does a water heater use is crucial for owners who need to control software bills, enhance...
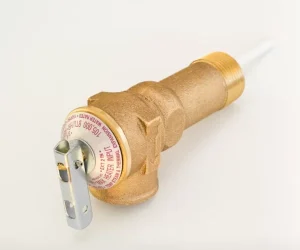
If you word water leaking from the pressure relief valve on water heater, it`s a signal that some thing isn`t...
Replacing an aircon machine is a primary investment, specially on the subject of a bigger unit. If you`re learning the...
When your furnace abruptly stops working, blows bloodless air, or refuses to show on, one of the first questions owners...
When looking for a brand new air con gadget or upgrading an older unit, one of the maximum not unusualplace...
As an HVAC system is essential for making the home environment comfortable. It is also important for commercial purposes whether...

If you control or very own a industrial property, one of the maximum crucial questions you`ll face is how long...
Owning a heat pump is a smart way to keep your home comfortable throughout the year. These systems are unique...

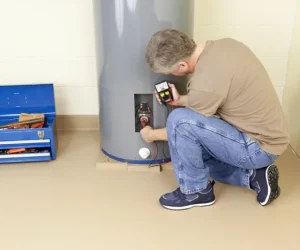
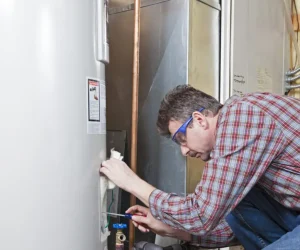
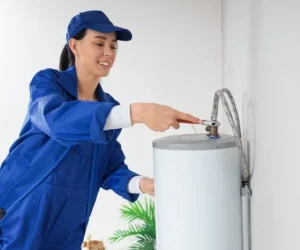
If you`re a house owner and thinking how to inform if a water heater is gas or electric powered, you`re...
Many homeowners are looking for ways to save money on monthly energy bills while helping the environment. Understanding what is...

Replacing an HVAC gadget is a primary investment, and it`s absolutely ordinary to wonder, can you finance a new HVAC...
Nobody wants to get burned by their shower water. But that’s exactly what happens when water heaters run too hot....
How long does a gas water heater last? A gas water heater usually lasts between 8 to 12 years. Some...
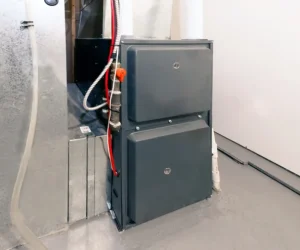
A furnace is a critical component of any household, and that’s especially true in cold climates, where warm air circulation can...

A leaking air conditioner is one of the maximum traumatic HVAC troubles a property owner can face. Whether the difficulty...
If your oil furnace stops generating warmth, continues shutting off, or won`t restart after jogging out of gas, the difficulty...
Replacing an oil furnace is one of the maximum crucial investments a property owner could make on the subject of...

A well-functioning gas furnace is vital for comfort, protection, and consistent heating during cold months. When your machine suddenly stops...

When the water is turned off in your house unexpectedly — for repairs, maintenance, or an emergency — you may be...

Installing a brand new water heater is a chief domestic project, specially while you are learning about how to install...
Your water heater works hard every day to keep hot water flowing through your home. But inside that steel tank...

Your HVAC device performs one of the maximum crucial roles for your home: maintaining your residing area comfortable, safe, and...
Choosing among a gas vs electric furnace can sense overwhelming, specifically whilst you need the pleasant stability of comfort, safety,...
When your furnace all at once stops working, blows bloodless air, or makes ordinary noises, one of the first questions...
Tankless water heater are one of the value able improvements for any home — efficient, compact, and able to provide...
Transporting or transferring a water heater raises a common question: Can you lay a water heater on its side? This...
If your electric powered water heater isn`t generating sufficient warm water, makes popping noises, or takes too lengthy to warmness,...
There`s not anything worse than moving into a chilly bathe or locating the laundry soaked in lukewarm water — specially...
Tankless water heaters are great for saving space and energy. But even small units can stand out in your home....
Imagine a severe winter storm knocking out power in your neighborhood. Will your furnace still provide heat? If you have...
Imagine ,You switch on your bathe anticipating a relaxing, heat begin to your day. But inside minutes… the water turns...
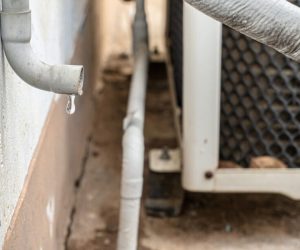
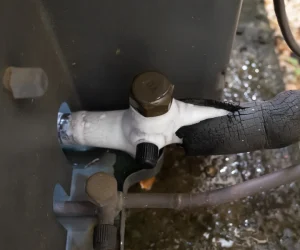
If you’ve recently noticed your furnace exhaust pipe dripping water, it can feel worrying especially during the cold months when...
When your water heater all at once begins offevolved rumbling, popping, crackling, or making uncommon sounds, it`s everyday to experience...
When it comes to keeping your home comfortable, your water heater plays an important role by supplying warm water for...

When putting in or changing a water heater, one of the maximum unnoticed but essential elements is the breaker size....
We have all had this experience: it is the day of July in Temecula you come home expecting a blast...
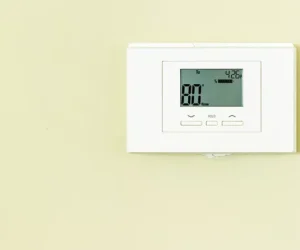
Have you ever noticed a small button or switch labeled “EM Heat” on your thermostat and wondered what it does?...
When the temperature begins offevolved rising, one of the best approaches to preserve your house cushty is via way of...
Installing a new air conditioner is one of the maximum impactful investments you could make on your home’s consolation and...
When your cooling cuts out right when you need it most, that first pang of worry is usually about the...
When your heating or cooling gadget stops working, one of the first things you possibly surprised by is: how much...
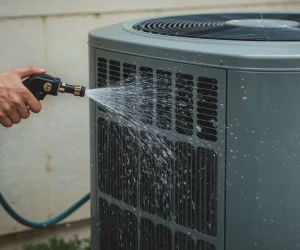
If you`re questioning how much does AC cleansing service costs, you`re no longer alone. A smooth air conditioner now no...
If your warm water all of a sudden turns cold, you`re probably questioning how to repair an electric hot water...

When summer temperatures rise, most owners activate their air conditioners to stay cool. But past cooling, many humans wonder —...
A heating domestic is vital throughout winter; however, what in case your furnace all of a once begins blowing cold...
If you`re changing your vintage water heater or putting in a brand new one, one of the first questions that...
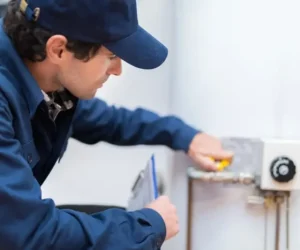
When your water heater stops working, knowing who to contact can save you time, money, and the frustration of cold...

You walk into your basement and find a puddle around your water heater. Your heart sinks. Water heater leaks can...

Have you ever became in your AC best to be greeted with the aid of using an unsightly scent? If...

Picture this It’s the middle of July, temperatures are hitting triple digits, and your air conditioner decides to quit. You’re...
Installing a brand new air conditioning machine is one of the maximum crucial choices for your house`s comfort and energy...
A thermostat is a small but essential device that controls your home’s heating and cooling system. It acts as the...
When your warm water all of a sudden runs cold, the primary question that comes to mind is: how much...
If you`ve ever wondered, “What does AC maintenance include?”, you`re no longer alone. Many house owners understand that everyday provider...
One of the most common questions owners ask is, How long does a water heater take to heat up? The...
Air conditioners are important for preserving your private home cool and snug throughout the warmest months of the year. But...

It’s the middle of summer and your air conditioner quits, or it’s a freezing winter night when your heating system...
If your air conditioning unit isn’t functioning effectively, a common reason can be a faulty capacitor. The capacitor is crucial...
Why is my AC not working? It’s a question no one wants to ask especially during a heatwave. Few things...
How to clean AC drain line is one of the most important maintenance tasks to keep your cooling system running...
Why AC compressor connected to pipe icing up is a common issue that many homeowners face, especially during heavy AC...
How to clean AC filter – it’s one of the simplest yet most important tasks to keep your air conditioner...
How to clean a coil on AC is a key part of maintaining your air conditioning system and ensuring it...

When it comes to keeping your home warm in winter and comfortable in summer, the choice often comes down to...

Electric heat pumps are necessary for maintaining home comfort, providing efficient heating and cooling year-round. However, like any system, they...
Let me give you short answer of your question about “What is short cycling AC?” Short cycling is when an...

The cost of replacing the HVAC system in a home is usually between $5,000 and $15,000.. For bigger homes or...
Wondering “How often should AC be serviced?” The simple answer is to have it professionally inspected at least once a...

If you ask why does my ac smell musty it usually means moisture and organic matter are building up inside...
When your heating and cooling systems begin to fail, the most pressing question for any homeowner is: what is the...
When it comes to buying an air conditioner, one of the most important things to consider is the SEER rating....

When it gets hot in the summer, you need the right air conditioner to stay cool. But how do you...

Air conditioning is more than just a cooling system. Most people hear “air conditioning” and immediately think cold air —...

When it comes to air conditioning, most people are familiar with the cool air that flows from their vents, but...
In the summer, there is nothing worse than having your air conditioner not cool down your house on a hot...
When we talk about whether an air conditioner uses gas, the confusion often lies in the word “gas” itself. Many...

You have seen that metal box that is sitting outside your house it is humming away in the heat. A...
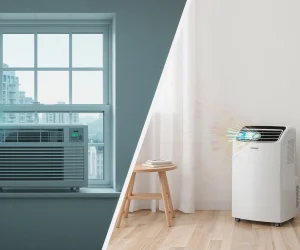
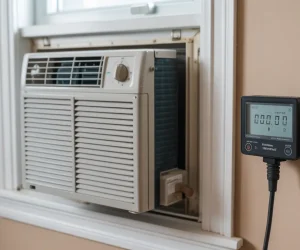
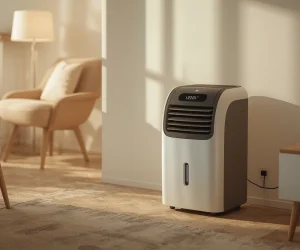
When it comes to cooling your home efficiently, Window Aircon vs Portable Aircon is a common comparison many buyers face....
When it comes to running an air conditioner, one of the first questions that comes to mind is how many...
How Many Watts Do They Use? If you’re considering cooling your space efficiently, understanding portable AC unit watts is essential....
As HVAC systems are becoming popular all over the world and provide a lot of benefits and comfort to homeowners,...
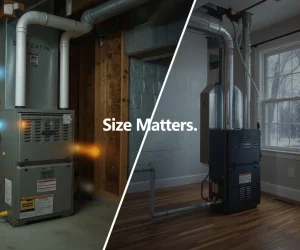
When it involves selecting a domestic heating gadget, one of the most common and vital questions is: What size furnace...
Choosing a central heating and air conditioning system is a big deal for your home. You want to be comfortable...
How to Reset AC Unit properly is essential when your cooling system stops working unexpectedly or isn’t performing efficiently. Many...
During hot summer days, an air conditioner is a big blessing. But what happens when it suddenly stops cooling? I...
Air conditioners are vital for maintaining comfort during hot weather but when they start leaking from air conditioner, it can...
How long do AC units last? This is a common question for homeowners looking to plan for future replacements or...
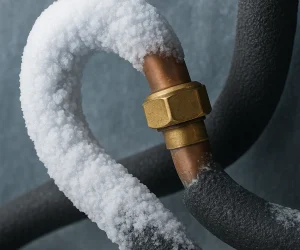
When your AC line freezes up, it can be very scary. After something like this, you might not know why...
Taking care of your air conditioner is crucial. You want it to keep working last long. Many homeowners ask, Can...
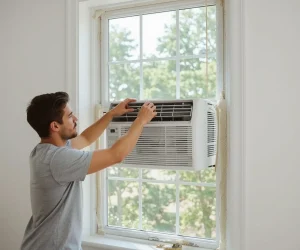
Installing a window air conditioner can appear intimidating at first, specially if you`ve in no way tackled an air conditioner...
If your air conditioner has started spitting out water, dripping from vents, or leaking onto your floors, you’re right to...
When you get your air conditioner fixed in Murrieta and Temecula it usually starts to cool your home within thirty...
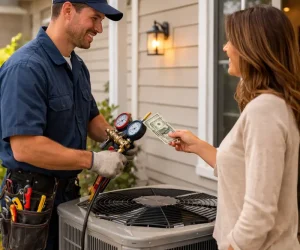
Home / Do You Tip AC Repair Guy? A Homeowner’s Guide to Showing Appreciation Hector P. Corkery January 15, 2026...