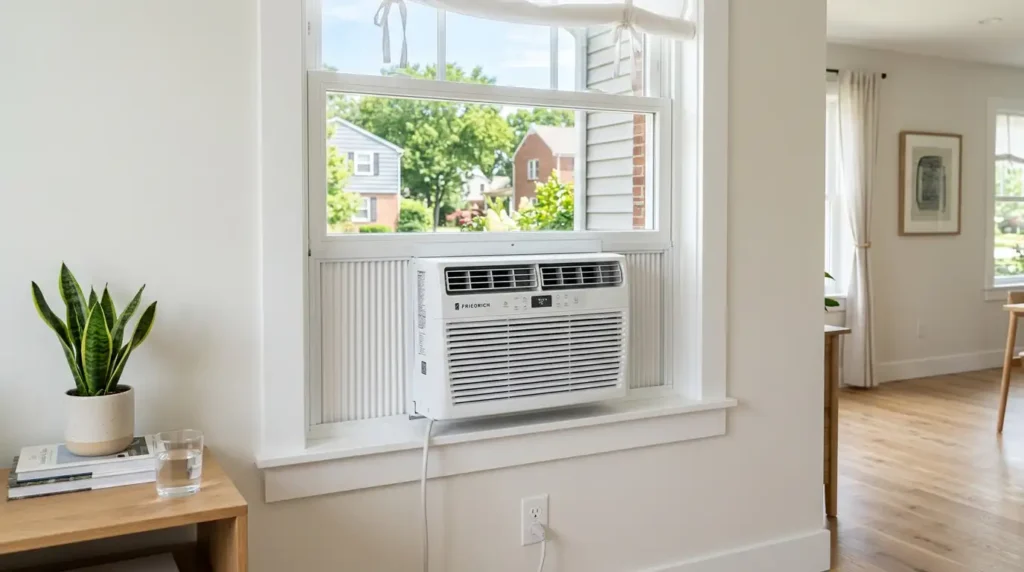
Summer in Temecula and Murrieta doesn’t wait around, and neither should your cooling plan. If your central air is overworked, your budget is tight, or you just need to cool one room fast, knowing how to install a window AC unit can save you money and time. With the right tools and a little patience, most homeowners can handle this in under an hour.
At Hutchinson Heating and Air, we’ve spent over 21 years helping local homeowners get reliable cooling, and this guide covers exactly what our technicians wish every customer knew before they pick up a screwdriver, from choosing the right size to avoiding leaks, noise, and wasted energy.
Key Takeaways
- Choose the correct BTU size for your room. Going too big or too small hurts efficiency.
- Tilt the unit back ¼ to ½ inch so condensation drains outside, not into your wall.
- Always use a dedicated outlet. Never run a window AC on an extension cord.
- This is a two-person job. The units are heavier and more awkward than they look.
- Seal every gap around the unit. Air leaks are the number one reason window units run constantly without actually cooling the room.
Know Before You Buy a Window AC

Before you even get to installation, the unit you buy and the window you pick will determine how well this whole project goes.
Choosing the Right BTU Size
BTU stands for British Thermal Unit, and it tells you how much heat the unit can remove from a room per hour. Bigger is not automatically better here. An oversized unit cools the air quickly but shuts off before it has time to pull humidity out of the room, which leaves the space feeling clammy. An undersized unit just runs nonstop and still can’t keep up. When our team at Hutchinson Heating and Air gets called out to fix a “broken” window unit, undersizing or oversizing is one of the most common culprits we find.
| Room Size (sq. ft.) | Recommended BTU |
| 150–250 | 5,000–6,000 |
| 250–350 | 7,000–8,200 |
| 350–450 | 9,800–10,000 |
| 450–550 | 12,000 |
| 550–700 | 14,000 |
If your room gets a lot of direct sun, add about 10% more BTU capacity. If it’s a shaded room, like one with a north-facing window, you can usually size down slightly.
Selecting the Best Window for Installation
Not every window is a good candidate. Look for:
- A window close to a grounded electrical outlet, ideally one that doesn’t share a circuit with other large appliances
- A frame that’s structurally sound, with no rot, cracks, or soft wood
- A location on the north or east side of the house when possible, since direct afternoon sun can reduce a unit’s efficiency
Double-hung windows that slide up and down are the easiest to work with, but sliding windows can also accommodate a window AC unit with the right side-panel configuration.
Tools Needed to Install Your AC Unit
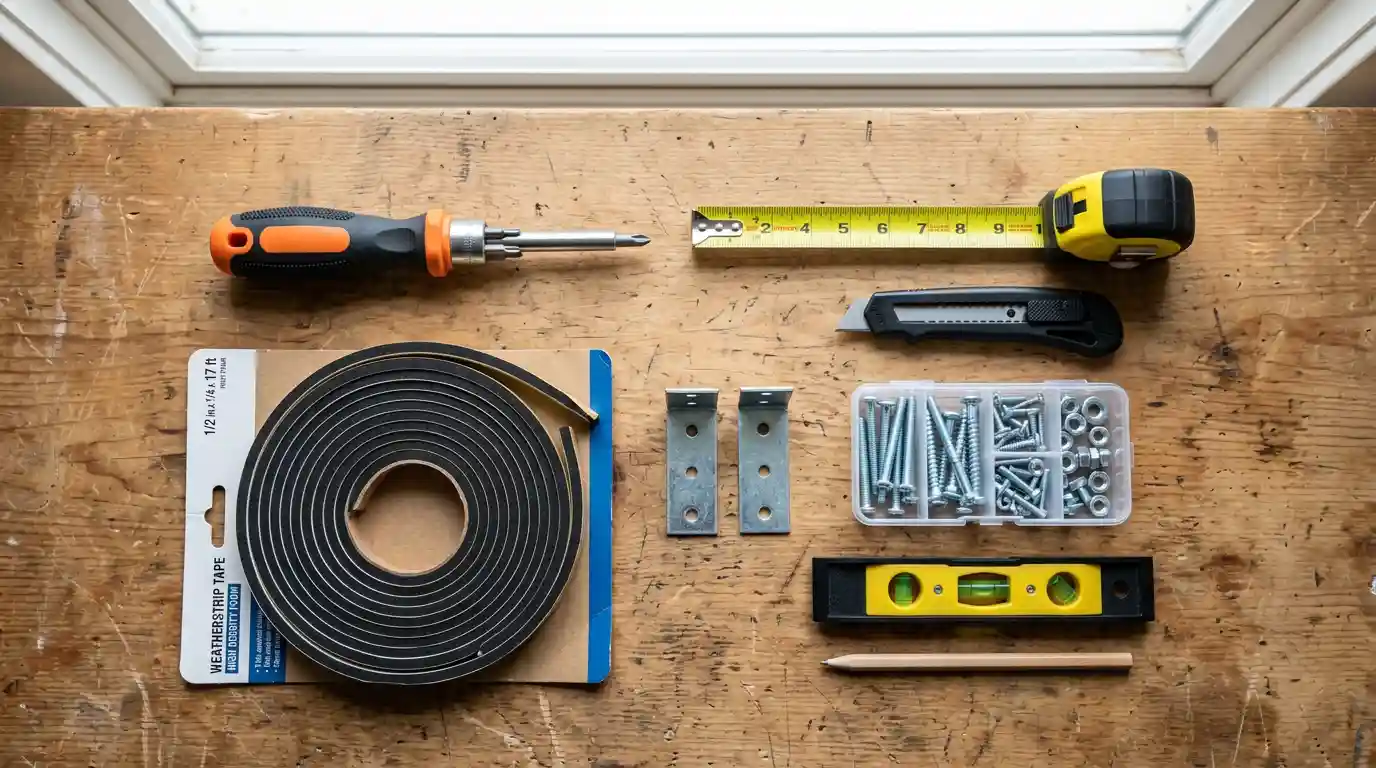 Gather everything ahead of time so you’re not running to the hardware store mid-project:
- Tape measure
- Screwdriver (Phillips and flathead)
- Level
- Foam weatherstripping or insulation strips
- Caulk (optional, for extra sealing)
- Support bracket (if not included with your unit)
- A helper, since most window units weigh 40 to 90 pounds
How to Install a Window AC Unit: Step-by-Step
This is the core process for nearly every standard double-hung window. Always check your unit’s manual first, since some brands have small variations.
Step 1: Prepare the Window
Clean the windowsill and frame thoroughly. Dirt and debris will prevent the foam seals from sitting flush, which leads to air leaks later. Inspect the frame for any damage that needs to be repaired before you proceed.
Step 2: Attach the Side Panels
Most window AC units come with accordion-style side panels. Slide or screw these onto the sides of the unit loosely for now. You’ll extend them fully once the unit is in place.
Step 3: Mark the Window Center
Open the window and measure to find the center point of the opening. Mark it lightly with a pencil. Centering the unit makes it easier to balance the weight evenly and keeps the side panels symmetrical.
Step 4: Lift and Position the Unit
This step is where having a helper matters most. Lift the unit together, keeping it level, and set it on the windowsill with the back half hanging slightly outside the frame. Most of the unit’s weight needs to rest on the sill itself, not on the side panels.
Step 5: Lower the Window Sash
Carefully pull the window sash down behind the top flange of the AC unit. This locks the unit in place from above and is one of the main things keeping it secure, so make sure the sash is firmly resting against the unit with no gap.
Step 6: Install the L-Bracket
Many units include an L-shaped bracket that attaches to the window sash and the frame. This prevents the bottom sash from being pushed open from outside, which is both a security feature and a safety one. Use a power drill to create pilot holes before driving the screws, especially on wood frames.
Step 7: Extend and Secure the Side Panels
Slide the accordion panels out until they meet the window frame on each side. Screw them into place. There should be no visible gaps between the panel and the frame when you’re done.
Step 8: Seal Any Remaining Gaps
Cut foam weatherstripping to fit any remaining space between the top sash and the unit, and press it firmly into place. This single step has the biggest impact on energy efficiency. Even a gap the width of a pencil lets warm air in and cool air escape, forcing the unit to run far longer than it should.
Step 9: Plug In and Test
Plug the unit directly into a grounded, dedicated outlet. Turn it on and let it run for a few minutes. Check that air is blowing steadily, listen for any rattling, and confirm the unit isn’t vibrating against the frame. If anything sounds off, recheck your brackets and panel screws.
This entire air conditioner installation process typically takes 30 to 60 minutes once you’ve got your tools laid out and a second set of hands ready to help.
Window AC Electrical Safety: What You Need to Know
This is the part of window ac installation that gets skipped most often, and it’s also where the real risk lives.
Most smaller window units run on a standard 115-volt, 15-amp circuit. Larger units, especially anything above 10,000 BTU, may need a 220-volt, 20-amp circuit. The voltage and amperage will be printed right on the unit’s nameplate, so check it before you plug anything in.
A few rules that matter:
- Use a dedicated circuit whenever possible. Sharing a circuit with a refrigerator, microwave, or other major appliance increases the risk of tripped breakers and, over time, can stress your home’s wiring.
- Never use a standard extension cord. Window units draw enough current that a typical extension cord can overheat, and according to fire safety data, air conditioning equipment is linked to thousands of home fires every year, often tied to improper wiring or cord use.
- Call an electrician if you’re not sure your outlet can handle the load. This is a quick check that prevents a much bigger problem down the line.
If your home’s panel is older or you’re installing a larger unit, it’s worth having a licensed professional confirm your setup before you plug in. This is exactly the kind of detail our team checks during AC installation services in Temecula & Murrieta, since a unit is only as safe as the circuit it’s running on.
Common Mistakes to Avoid
Even a straightforward window AC unit installation can go wrong in small ways that add up. Watch out for these:
- Choosing the wrong size unit. Too big wastes energy and leaves humidity behind. Too small never quite cools the room.
- Skipping the seal. Gaps around the unit are the single biggest cause of poor performance.
- Tilting the unit the wrong way. If it tilts toward the room instead of away from it, condensation drains inside instead of outside.
- Skipping the support bracket. Without one, the weight rests entirely on the window sash, which can warp or fail over time.
- Plugging into a shared circuit. This is the most common cause of nuisance breaker trips with window units.
- Ignoring the manual. Every brand has small differences in how the panels, brackets, and drainage are set up. The manual is written for your specific model, not a generic one.
Maintaining Your Window AC Unit
Installing the unit correctly is half the job. Keeping it running well is the other half.
- Clean the filter every two to four weeks during heavy use. A clogged filter restricts airflow and makes the unit work harder than it needs to.
- Inspect the drainage path periodically to make sure water is draining outside and not pooling on the sill.
- Remove and store the unit properly during the off-season if your climate allows it, which protects the coils and casing from weather damage.
- Check the seals at the start of each season, since foam weatherstripping can compress or shift over time.
Can You Install a Window AC Unit By Yourself?
Technically, yes. A standard window AC unit installation doesn’t require a license, and plenty of homeowners do it themselves every year. That said, it’s worth being honest about the risks. These units are heavy, the work happens at a window ledge, and a unit that isn’t properly braced can shift or fall. If you’re confident with basic tools, have a helper, and your window is a standard size, doing it yourself is reasonable.
Where people run into trouble is with heavier units, oddly shaped windows, or older homes with wiring that wasn’t built for modern appliances. In those cases, the time saved by doing it yourself isn’t worth the risk to the window, the wall, or your electrical system.
When to Call a Professional
There are a few situations where it makes sense to bring in a professional rather than handle the air conditioner install on your own:
- The unit is large or heavy enough that lifting it safely is a concern
- Your window is a non-standard size or shape
- You’re not sure if your electrical setup can support the unit’s amperage
- You want the installation covered under a workmanship warranty
- You’ve had recurring issues with leaks, noise, or breaker trips after a previous DIY install
A professional can also evaluate whether a window unit is even the right fit for your space, or whether a different cooling option would serve you better long-term.
Need Help With Your Window AC Installation?
A window AC unit can be a great short-term or supplemental cooling solution, but it only works as well as the installation behind it. If you’d rather skip the ladder, the guesswork, and the trip to check your breaker panel, our team at Hutchinson Heating and Air is here to help. We’ve been handling AC installation services in Temecula & Murrieta since 2004, and we bring the same attention to a single window unit that we bring to a full system install.
Call us at (951) 267-6326 or schedule your service online, and we’ll make sure your unit is installed safely, sealed properly, and running the way it should from day one.
FAQs
Do window AC units need to be screwed in?
Yes, most manufacturers recommend screwing in the side panels and the L-bracket. This keeps the unit from being pushed out of the window from outside and adds stability against vibration while it’s running.
What’s the correct tilt for a window air conditioner?
The unit should tilt back about ¼ to ½ inch so condensation drains outside instead of into your home. Most units have a built-in guide or marking to help you check this once it’s in the window.
Can I use a regular extension cord with my window AC?
No. Standard extension cords aren’t rated for the current a window AC draws and can overheat. If your outlet isn’t close enough, have an electrician install one rather than relying on a cord.
How long does window AC installation take?
Most installations take 30 to 60 minutes with two people and the right tools on hand. Older windows or units requiring extra bracket work may take a bit longer.
Does a window AC unit need to be level?
Not perfectly level, no. It actually needs a slight backward tilt for proper drainage. What matters more is that it’s stable and securely supported on both sides.