Quick Answer: To test an AC capacitor, shut off power at the breaker, discharge it with an insulated screwdriver, then set a digital multimeter to capacitance mode and compare the reading to the microfarad rating printed on the capacitor. A reading more than 10% outside that range means replacement is needed.
If your air conditioner is humming, struggling to start, or blowing warm air, the capacitor is often the reason. It’s one of the most common failure points our technicians see every summer. This guide walks through how to test AC capacitors safely, using the same method our team at Hutchinson Heating and Air relies on in the field, so you know exactly what a good versus bad reading looks like.
What’s Your AC Doing Right Now?
Before grabbing any tools, take a minute to notice exactly what your system is doing. The symptom often points straight to the capacitor.
If the outdoor unit won’t start at all, or you hear a faint hum but nothing spins, that’s a classic sign. If the fan is turning slowly or not turning at all while the compressor sounds like it’s straining, that also points to a weak capacitor. Warm air blowing from your vents, an AC that shuts off on its own after a few minutes, or a noticeable jump in your energy bill can all trace back to the same small component. None of these symptoms confirm the problem on their own, but together they’re usually enough reason to test the capacitor before assuming something bigger, and more expensive, is wrong.
What an AC Capacitor Does (and Why It Fails)
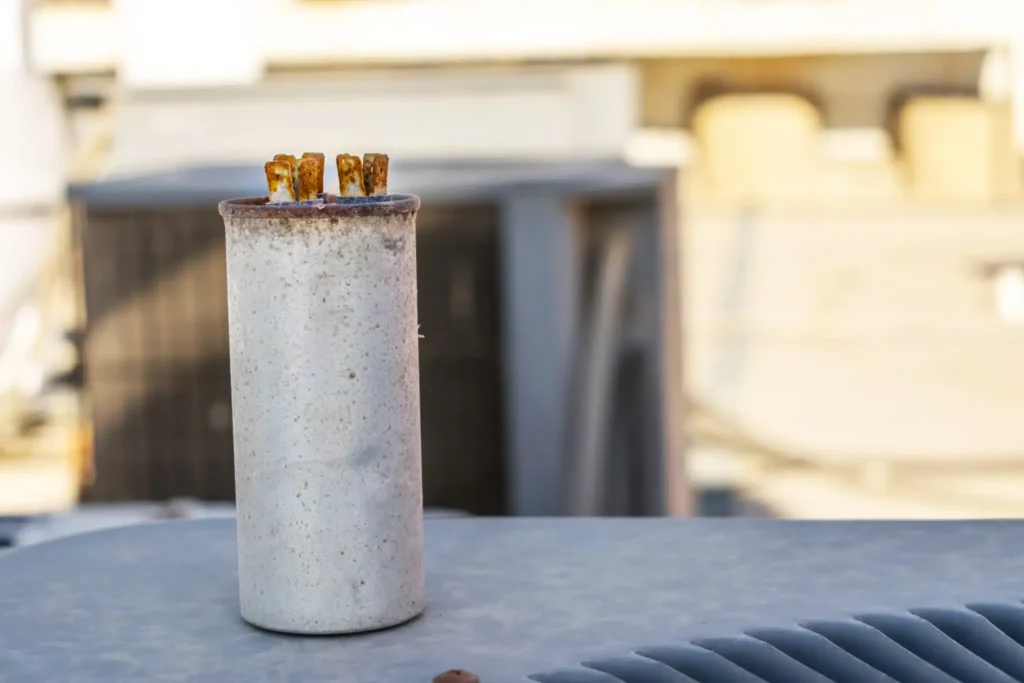
A capacitor works like a short-term energy reservoir. It stores electrical charge and releases it in a quick burst to help the compressor and fan motor overcome resistance and start turning. Once the motor is running, the capacitor keeps feeding it a steady flow of voltage so it doesn’t stall or overheat.
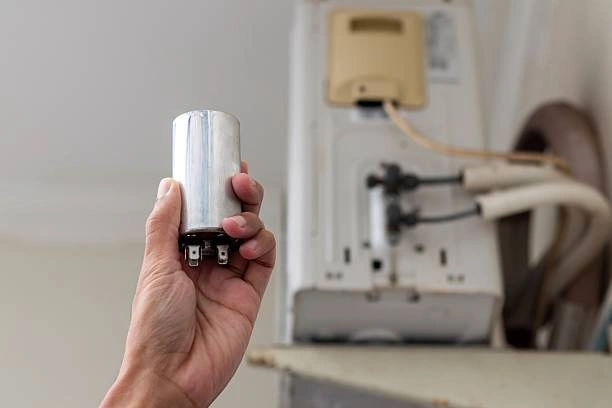
Most residential systems use either a start capacitor, a run capacitor, or a dual capacitor that handles both jobs in one cylindrical unit. You’ll usually find it inside the outdoor condenser, mounted near the compressor and fan motor, often protected by a metal bracket. It looks like a small metal can, sometimes gray or black, with two or three terminals on top labeled HERM, FAN, and C.
Capacitors fail for fairly predictable reasons. Southern California heat is hard on them because prolonged high temperatures cause the internal dielectric material to break down faster than in milder climates. Power surges, age, and simply years of daily cycling all wear the component down until it can no longer hold or release charge properly. This is why testing AC capacitor health isn’t a one-time task. It’s something worth checking whenever your system starts acting off, especially during peak summer months.
Signs of a Bad Capacitor
A failing capacitor rarely gives just one symptom. Watch for a combination of these signs before you test. Physically, a bad capacitor often shows visible bulging or doming on the top instead of a flat surface, oily residue or rust near the terminals, or dark discoloration and burn marks on the casing. Behaviorally, you might notice the outdoor fan spinning slowly or not at all, a humming or clicking sound as the compressor tries and fails to start, warm air despite the system running, or the unit shutting off randomly mid-cycle.
Higher than normal energy bills during the cooling season, paired with any of the above, is another strong indicator that the capacitor is working harder than it should to keep the system alive. If you’re seeing two or more of these signs together, it’s worth moving forward with a test rather than guessing.
Before You Touch Anything: Safety Steps
This is the part homeowners tend to rush, and it’s the part that matters most. A capacitor stores electrical charge even after the power is off, and that stored charge can deliver a serious shock if you’re not careful.
Start by turning off the thermostat, then head to your main electrical panel and shut off the breaker connected to the outdoor AC unit. Most systems also have a separate disconnect box mounted near the condenser itself, usually a small gray box with a pull handle. Remove that too, for a second layer of protection. Once power is fully cut, open the access panel on the outdoor unit with a screwdriver to expose the capacitor.
Before touching the terminals, discharge the capacitor using an insulated screwdriver. Hold it firmly by the insulated handle and touch the metal shaft across two terminals at a time, briefly bridging the connection. You may see a small spark, which is normal and confirms the charge is dissipating. Repeat across all terminal pairs if your capacitor has three. Never skip this step, and never touch the terminals directly with bare hands or an uninsulated tool.
For tools, you’ll want a digital multimeter with a capacitance setting, an insulated flathead screwdriver, and ideally a pair of needle nose pliers for handling wires. Safety glasses and rubber-soled gloves are a smart addition, especially if you’re new to this kind of work.
How to Test an AC Capacitor with a Multimeter
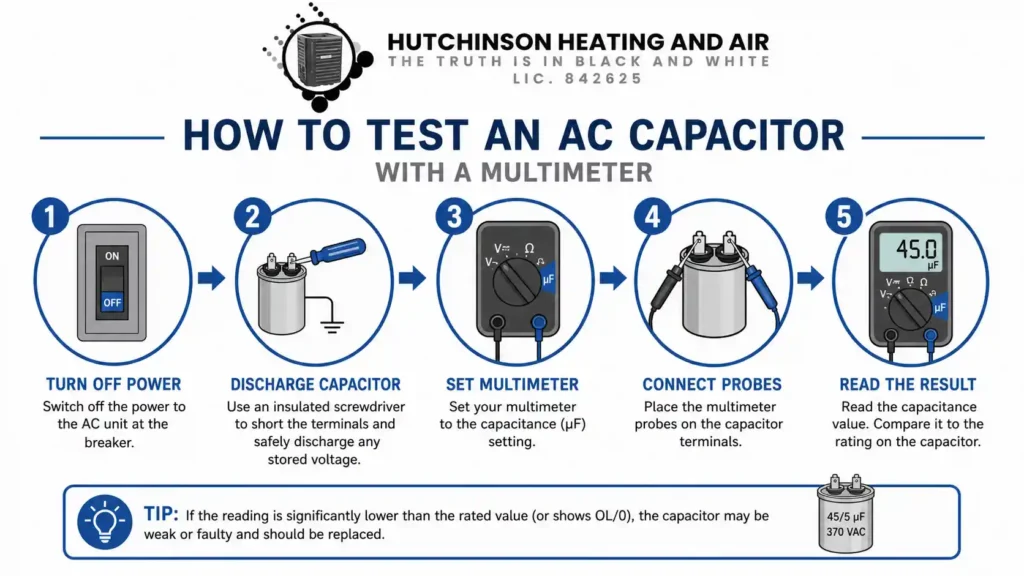
Once the capacitor is discharged and the area is safe to work in, here’s how to test AC capacitor with a multimeter from start to finish.
First, take a photo of the wiring before disconnecting anything, so you can reference it later. Then carefully remove each wire from the capacitor terminals one at a time, using pliers if they’re tight, and set them aside without letting the bare ends touch each other or the unit’s frame. With the capacitor now isolated, set your multimeter dial to the capacitance setting, usually marked with a symbol like “F” or “µF.” Touch one probe to each terminal you want to test. For a dual capacitor, you’ll test each pair separately, HERM to C and FAN to C.
Hold the probes steady and let the reading stabilize for a few seconds. Write down the number that appears. Compare that reading to the microfarad rating printed directly on the capacitor’s label. If the number falls within an acceptable range of that rating, the capacitor is healthy. If it’s noticeably lower, or the multimeter shows zero or an open circuit, the capacitor has failed. Repeat the test once more to confirm consistency before drawing conclusions, since a shaky first reading isn’t unusual.
This same process applies whether you’re testing an ac capacitor with a multimeter on a central AC system, a heat pump, or most residential condenser units, since the internal components function almost identically across brands.
Reading the Results
Interpreting the number on your multimeter is where most homeowners get stuck, so here’s a simple way to think about it. Capacitors are rated with a tolerance range, usually plus or minus 6% of the printed microfarad value, though some manufacturers allow up to 10%.
| Capacitor Rating (µF) | Acceptable Range | What It Means |
| 35 µF | 32.9 to 37.1 µF | Healthy, no action needed |
| 45 µF | 42.3 to 47.7 µF | Healthy, no action needed |
| 45 µF reading 30 µF | Below range | Weak, replace soon |
| Any rating reading 0 µF | No reading | Failed, replace immediately |
If your reading falls inside the range, the capacitor is doing its job even if other parts of your system need attention. If it reads low, the capacitor is degrading and will likely fail completely within weeks or months. A zero or wildly inconsistent reading means it’s already dead.
Can You Check It Without a Multimeter?
If you don’t own a multimeter, you can still get a rough idea of capacitor health through observation alone, though this method is far less precise. Look closely at the capacitor’s casing for bulging, cracking, or leaking, all of which confirm failure without needing a single measurement. Listen to the unit while it attempts to start. A persistent hum with no fan movement, or a compressor that struggles and clicks repeatedly, strongly suggests the capacitor isn’t delivering enough of a starting charge.
That said, a multimeter is the only way to catch a capacitor that’s weakening but hasn’t failed outright yet, which is why relying on visual inspection alone often means catching the problem later than you should.
Mistakes That Lead to Wrong Readings or Injury
A handful of small errors account for most bad outcomes when testing AC capacitor units at home. Skipping the discharge step is the most dangerous one, since it’s the leading cause of shock injuries during DIY capacitor work. Forgetting to fully cut power at both the breaker and the disconnect box is a close second.
Beyond safety, accuracy issues are common too. Mixing up which wire connects to which terminal can cause confusion during reinstallation, so always label or photograph the wiring first. Testing with the multimeter set to the wrong function, such as resistance instead of capacitance, will give you a meaningless number. And touching the probes to the terminals with shaky or inconsistent contact often produces a false low reading that looks like failure when the capacitor is actually fine. Taking your time with each step avoids nearly all of these problems.
If the Capacitor Is Bad: What Happens Next
A failed capacitor doesn’t just mean a warm house. Left alone, it forces the compressor to draw more amperage than it’s designed for every time it tries to start, which generates excess heat and accelerates wear on the motor windings. Over weeks, that added strain can shorten the compressor’s lifespan considerably, turning a small part replacement into a much larger repair bill.
Replacing a capacitor yourself is possible if you’re comfortable with the safety steps above and confident in matching the exact microfarad rating and voltage tolerance of the original part. Where it gets risky is with dual capacitors, tight wiring configurations, or units where the failure has already damaged surrounding components. In those cases, or if you’re simply not confident working around live electrical parts, it’s worth having a professional handle it. Our team at AC Repair Murrieta and Temecula diagnoses and replaces capacitors on the same visit in most cases, usually within an hour.
Replacement parts typically run affordably on their own, though labor and any additional diagnostics can add to the total, especially for emergency same-day service during peak summer demand.
Field Notes from the Field
Hector, our lead technician at Hutchinson Heating and Air, has seen capacitor failures follow a pretty consistent pattern across Temecula and Murrieta homes. Units facing direct afternoon sun with little airflow around the condenser tend to run hotter internally, and that heat is what quietly cooks a capacitor from the inside out long before it visibly bulges. He’s also found that homeowners who replace a failed capacitor without checking the contactor next to it often end up with a repeat failure within a season, since a worn contactor arcs and sends irregular voltage back through the new capacitor.
His advice for anyone testing their own system is to check the capacitor twice, once cold and once after the unit has attempted to run for a minute, since some capacitors test fine at rest but fail under actual load.
You may read: Why Is My Ac Not Working?
How to Make Your Capacitor Last Longer
A few habits meaningfully extend capacitor life. Scheduling seasonal AC maintenance before summer lets a technician catch a weakening capacitor before it fails during a heatwave, when replacement parts and appointments are hardest to get quickly. Keeping the outdoor condenser clear of debris, leaves, and overgrown landscaping improves airflow and keeps internal temperatures lower.
Installing a whole-home surge protector is worth considering if your area experiences frequent power fluctuations, since voltage spikes are one of the fastest ways to kill a capacitor outright. Finally, if your system is over ten years old, replacing capacitors proactively during routine maintenance, rather than waiting for failure, tends to save money over time by avoiding emergency repair costs and reducing strain on the compressor.
Conclusion
Testing an AC capacitor isn’t complicated once you understand what you’re checking and why, but it does demand respect for the electrical charge stored inside. If you’ve walked through this guide and confirmed a bad reading, or you’re simply not comfortable handling the multimeter test yourself, reach out to Hutchinson Heating and Air. Our licensed, NATE-certified technicians can test, diagnose, and replace a capacitor safely, often the same day you call, so your system is back to cooling without the guesswork.
Testing an AC capacitor isn’t complicated once you understand what you’re checking and why, but it does demand respect for the electrical charge stored inside. If you’ve walked through this guide and confirmed a bad reading, or you’re simply not comfortable handling the multimeter test yourself, contact us at Hutchinson Heating and Air. Our licensed, NATE-certified technicians can test, diagnose, and replace a capacitor safely, often the same day you call, so your system is back to cooling without the guesswork.
FAQs
How do I know if my AC capacitor is bad without a multimeter?
Look for physical signs like a bulging or leaking casing, and listen for humming without fan movement when the unit tries to start. These signs are reliable indicators of failure, though a multimeter is still the most accurate way to confirm a weakening capacitor before it fails completely.
Can I test an AC capacitor while it’s still connected to power?
No, testing an AC capacitor with a multimeter should only be done after power is fully cut at the breaker and disconnect box, and after the capacitor has been safely discharged. Testing a live capacitor risks serious electrical shock and inaccurate readings.
How much does it cost to replace an AC capacitor?
Capacitor parts themselves are relatively inexpensive, though total cost depends on labor, diagnostic time, and whether service is scheduled or emergency same-day. A licensed technician can give an exact quote after confirming the capacitor’s rating and your system’s model.
How long do AC capacitors typically last?
Most capacitors last between five and ten years, though extreme heat, frequent power surges, and poor maintenance can shorten that significantly. Homes in hotter climates often see capacitors wear out on the earlier end of that range.
Is it safe to replace a capacitor myself after testing it?
If you’re confident matching the exact microfarad rating and have followed proper discharge and safety steps, replacement is a manageable DIY task for many homeowners. However, if your system uses a dual capacitor or shows signs of related component damage, professional installation is the safer choice.